So let me try my hand at a tutorial on Freezer Paper Stencils - before i run off to our Financial Peace class.. that starts soon.. I took a picture of every step. I just wanted to see how easy it is to understand.
1. find your stencil and print it on freezer paper. i recommend taping the freezer paper to another piece of paper and running it thru the printer.. or um.. your freezer paper will get all squashed in your printer - like mine did! You could also trace anything or make a stencil free hand.

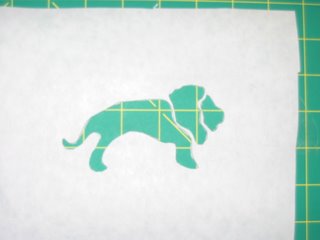
2. cut it out, i just used a box cutter but an exacto would probably be more exacto.. :)

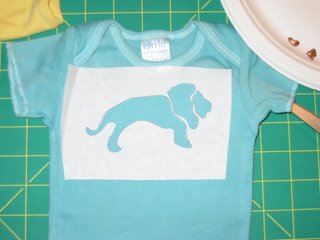
3. Iron it on the shirt you will stencil. and also iron another piece of freezer paper the same size of your stencil to the back of the stencil on the inside of the shirt, so the paint doesn't soak thru to the other side of the shirt

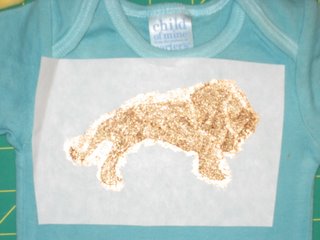
4. pick your fabric paint color(s) i chose bronze, it just seemed appropriate for my lion. :) and fill in your stencil. This was my favorite part. it makes all the cutting out worth while!

5. remove the stencil immediately and let it dry the recommended time. Be sure to heat set it; like iron or throw in the dryer for a few minutes. Ta Da! you have made a stenciled shirt how fun! i loved it! These are the others i made. I made all three in just a couple hours! ok off to Financial Peace to have Financial Peace..

1. find your stencil and print it on freezer paper. i recommend taping the freezer paper to another piece of paper and running it thru the printer.. or um.. your freezer paper will get all squashed in your printer - like mine did! You could also trace anything or make a stencil free hand.

2. cut it out, i just used a box cutter but an exacto would probably be more exacto.. :)

3. Iron it on the shirt you will stencil. and also iron another piece of freezer paper the same size of your stencil to the back of the stencil on the inside of the shirt, so the paint doesn't soak thru to the other side of the shirt

4. pick your fabric paint color(s) i chose bronze, it just seemed appropriate for my lion. :) and fill in your stencil. This was my favorite part. it makes all the cutting out worth while!

5. remove the stencil immediately and let it dry the recommended time. Be sure to heat set it; like iron or throw in the dryer for a few minutes. Ta Da! you have made a stenciled shirt how fun! i loved it! These are the others i made. I made all three in just a couple hours! ok off to Financial Peace to have Financial Peace..


1 Comments:
At 11:59 AM, heather said…
fun! i love those! :)
Post a Comment
<< Home